JULY 2021
Imaging a 10-day old Moon
[This is just one of many articles in the author’s Astronomy Digest.]
On the evening of the 19th of July 2021, a 10 day old Moon was setting towards the southwest. Having a low declination of -20, its elevation was only 15 degrees from northern England. However the ‘seeing’ was surprisingly good. Whilst waiting to carry out some deep sky imaging with as TS 90 mm, f6.6, triplet objective refractor, I decided to use my ZWO ASI 178 webcam having a 7.4 x 5 mm monochrome sensor to image it. I was a little surprised that the whole of the visible Moon’ disk was captured by the sensor. However, it could not quite achieve this if the Moon were full.
The aim was to take a video sequence of 2,000 frames using SharpCap as thus, by only aligning and stacking the best frames, to use the ‘lucky imaging’ technique to obtain as high a resolution image as I could. One can consider what is the best resolution that one might hope to obtain assuming that the effects of atmospheric turbulence could be eliminated. (At times of excellent seeing, this can be possible.) Two constraints will limit the resolution: the nominal resolution of the telescope and how well the captured frames are sampled by the camera sensor. The ‘Dawes Limit’ for a 90 mm aperture telescope is 1.33 arc seconds so this could be the limiting factor if the sensor was fully sampling the image. The ASI 178 has a pixel size of 2.4 microns and so, with a focal length of 594 mm, each pixel subtends 0.83 arc seconds. To get this value, with both in mm, one first divides the pixel size by the focal length of the telescope – (2.4/1,000)/594. This gives the subtended angle in radians. The result is then multiplied by 57.3 to give the result in degrees and then by 3,600 to give the result in arc seconds. In general:
Theta = ((pixel sizein microns/1000) / focal length in mm) x 57.3 x 3600 arc seconds
The Nyquist Theorem states that, to fully sample a surface, this must be 1/3 the hoped for resolution (not 1/2). So this would limit the achieved resolution to ~2.4 arc seconds and would thus be the limiting factor.
There is, however, a method of reducing the effective size of the pixels and so hopefully improving the resolution. Called ‘drizzling’, (formally ‘Variable Pixel Linear Reconstruction’) it was developed for use with the first Hubble Space Telescope Wide Field Camera where the pixel size was too large to fully sample the images produced by the telescope. When aligning and stacking the best frames from the video sequence, Autostakkert! can carry out a x1.5 drizzle to produce an image 150% larger in both dimensions than the sensor size. The key requirement for an improvement to be gained is that image moves very slightly over the sensor as the video sequence is taken and atmospheric seeing will almost certainly ensure this. The ZWO 178 has a sensor with 3096 x 2080 pixels and so the resulting stacked image will have a size of 4644 x 3120 pixels. When the frames of the video sequence are aligned and stacked, they are increased in size and placed of a pixel grid whose dimensions are 3 times larger than the sensor. The stacked image is then down sampled by a factor of 2 to give the output file. At best, the effective size of each pixel is reduced to 0.55 microns and so the resolution limit might then be ~1.5 arc seconds rather than ~2.4 arc seconds making it comparable to that of the refractor. Combining the two resolution factors will reduce the resolution that could be achieved somewhat over them individually.
[The drizzletechnique is now being used by some cameras where, in taking 8 or 16 frameswhen tripod mounted, the sensor is moved very slightly from frame toframe. When increased in size andaligned and stacked, a higher resolution image results.]
The brightened output from Autostakkert!
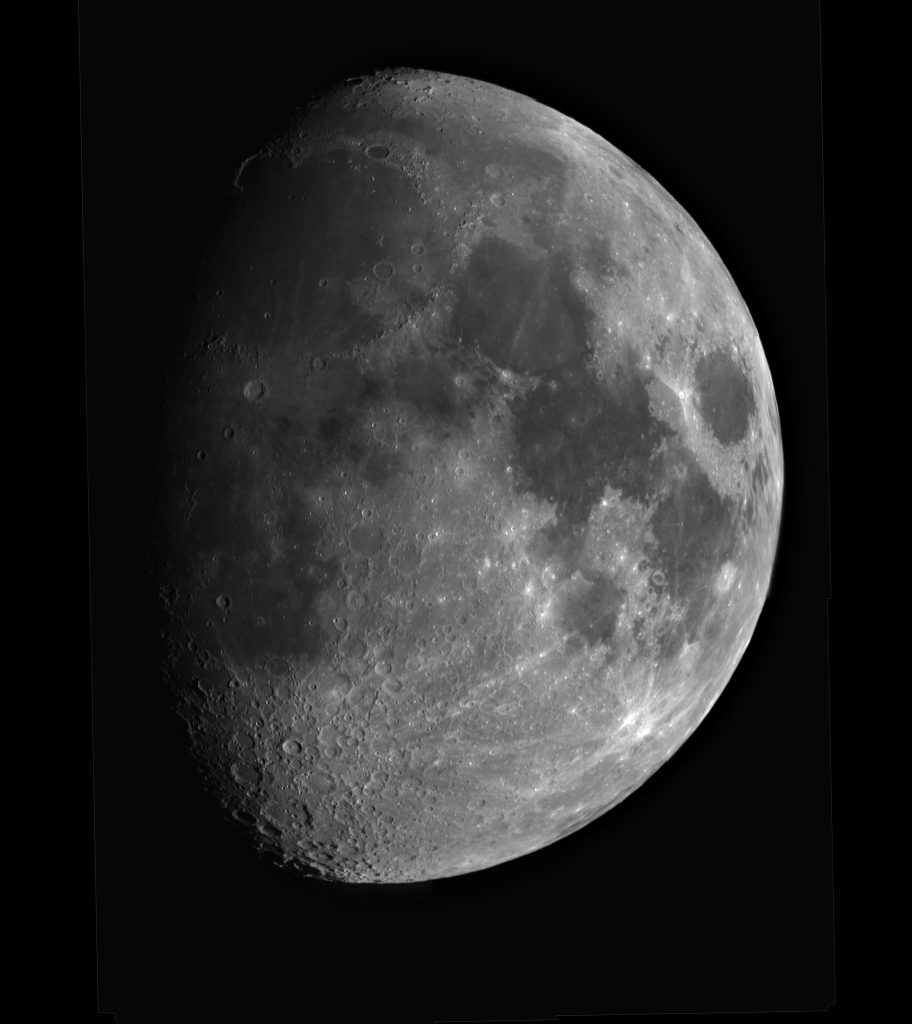
Enhancing the LunarImage
The image produced by Autostakkert!can then be enhanced by sharpening and increasing its tonal contrast.
DeconvolutionSharpening
An excellent method of sharpening lunar images is to use what is called ‘deconvolution sharpening’ which can actually slightly increase the resolution of the image. The image produced by Autostakkert! is the result of convolving the Moon’s surface with the blurring effects of the atmospheric seeing, the Airy disk size of the telescope and the limited sampling of the image by the sensor. In as iterative process, deconvolution sharpening attempts to deduce what the image would look like without the blurring effects. It was also used (and may still be) when processing the early Hubble images. Happily, the now free astronomy processing software, Images Plus includes several deconvolution sharpening techniques.
Having loaded the lunar image into Images Plus, in the ‘Smooth Sharpen’ drop down menu you will find ‘Adaptive Richardson-Lucy Restoration’. Clicking on this will bring up the control window with 10 iterations as the default value. The effect of watching the process in action is somewhat magical. One can set a large number of iterations – say 30 – and step through each iteration to see the result. It will be obvious when sufficient iterations have been done. In this case I applied 10 iterations.
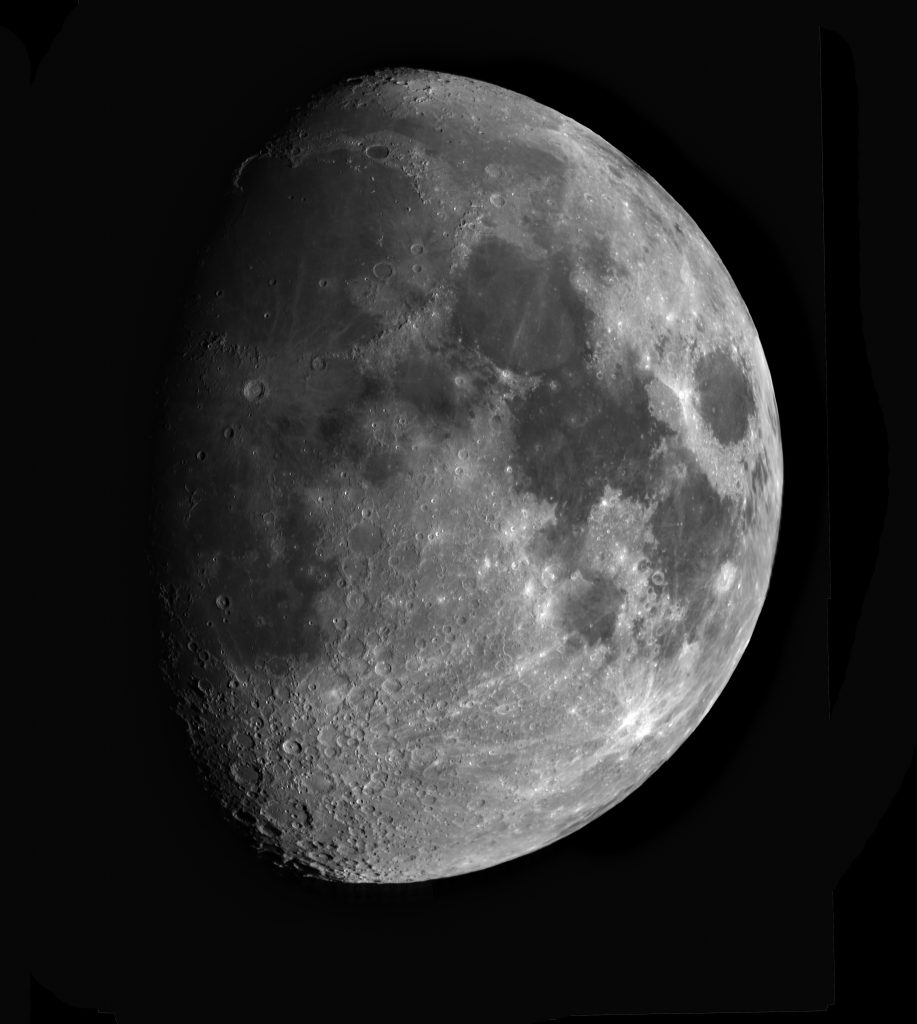
Smart Sharpening
In Adobe Photoshopor other editing program, the perceivedsharpness can be improved by using the ‘Smart Sharpen’ filter. I used a radiusof 5 pixels and an amount of 25%.

Local ContrastEnhancement
This can be used alter the relationship between the brighter and darker parts of the lunar image. In particular, darkening the mare. For this I use the ‘Unsharp Mask’ Filter with a large radius and small amount. (The opposite as when using it to sharpen images – which is not the best way.) There is a problem; if applied to the whole image, the bright limb adjacent to the black sky is over brightened. So, first, a feathered selection must be made removing this part of the lunar disk and also two bright regions which would have been over brightened.
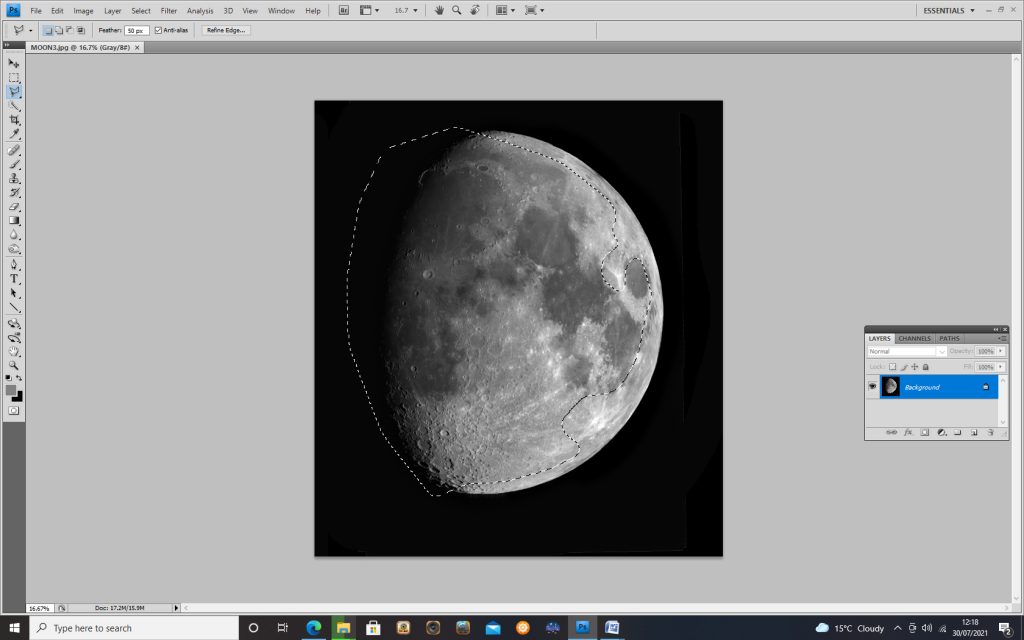
The unsharp mask filter was then applied to the remaining lunar surface with a large radius and small amount. These values adjusted to give the desired effect.
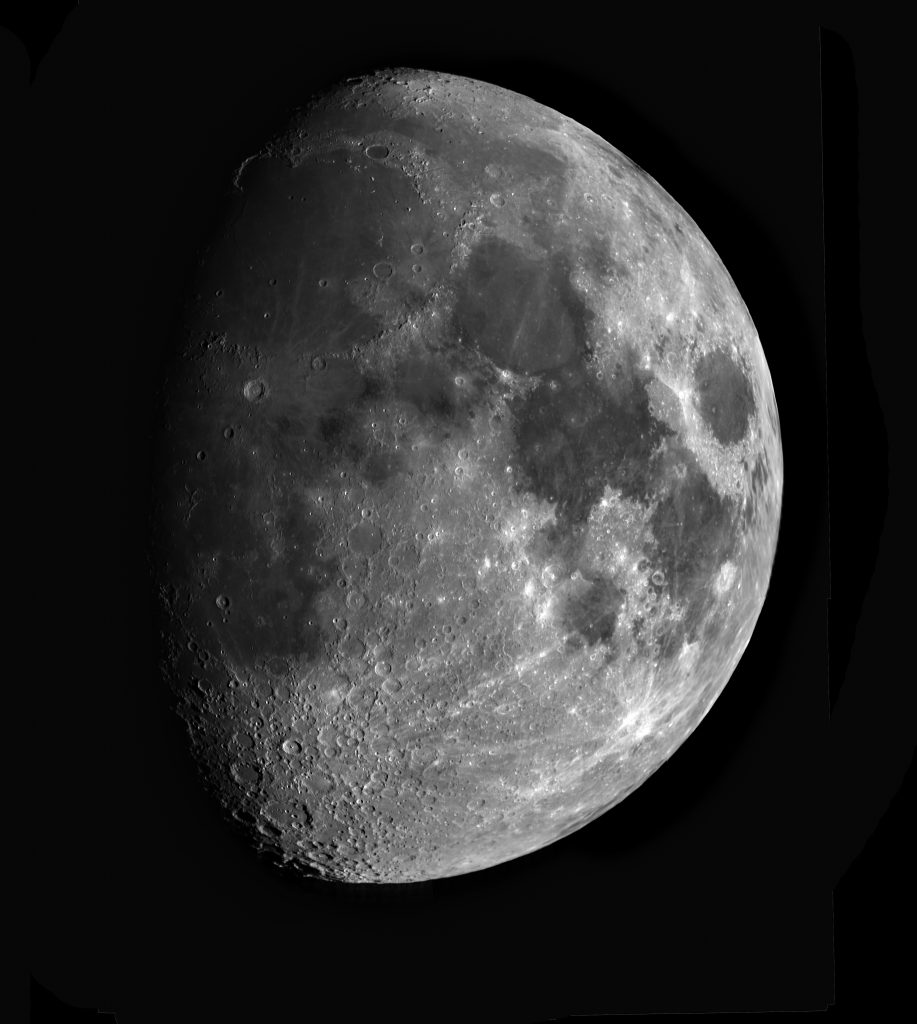
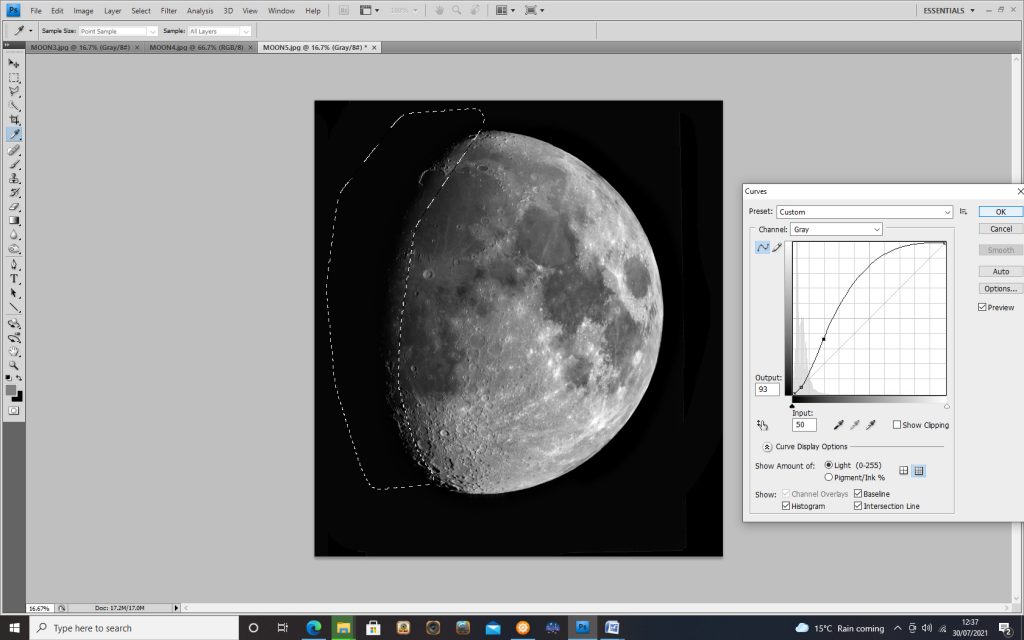
The rim of Sinus Iridum at the top left of the image does not show up too well and the image could be enhanced by brightening up the dark limb region. So this region was selected with 50 pixel feather and the ‘Curves’ function was then used to lift up the brightness of this part of the lunar surface to give the final lunar image.
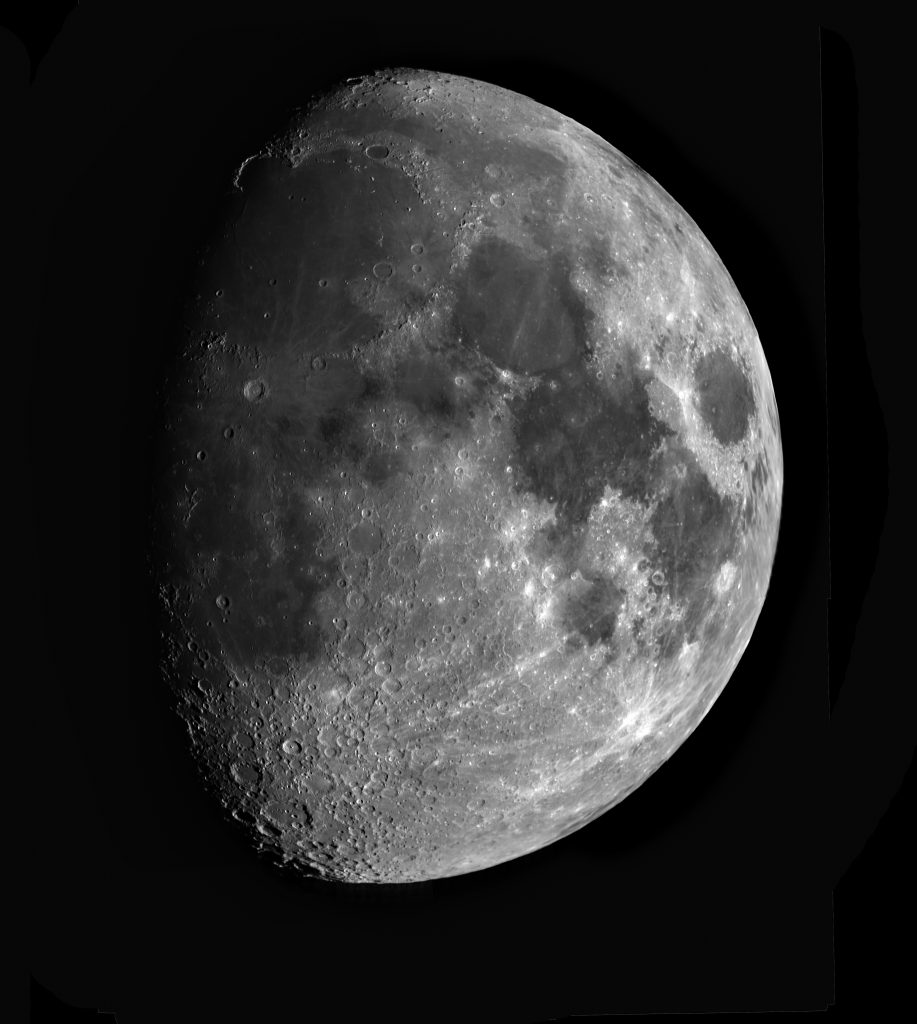
By looking at the pixel brightness values around a small bright spot of the limb of a crater, it is possible to judge the achieved resolution. For this image it appeared to be around 1.5 arc seconds so the effects of drizzling and devolution sharpening do appear to have had an effect. I suspect that this is about as good a lunar image that can be achieved with a 90 mm aperture refractor.
I have achieved a lunar image with a resolution of 0.7 to 0.8 arc seconds by using a 200 mm aperture, 1,800 focal length telescope so reducing both the size of the Airy disk and the angle subtended by each pixel which used a webcam with 3.75 micron sized pixels..