FEBRUARY 2020
Sony α7S first light: the Sword of Orion and the Pleiades Cluster
[This is just one of many articles in the author’s Astronomy Digest.]
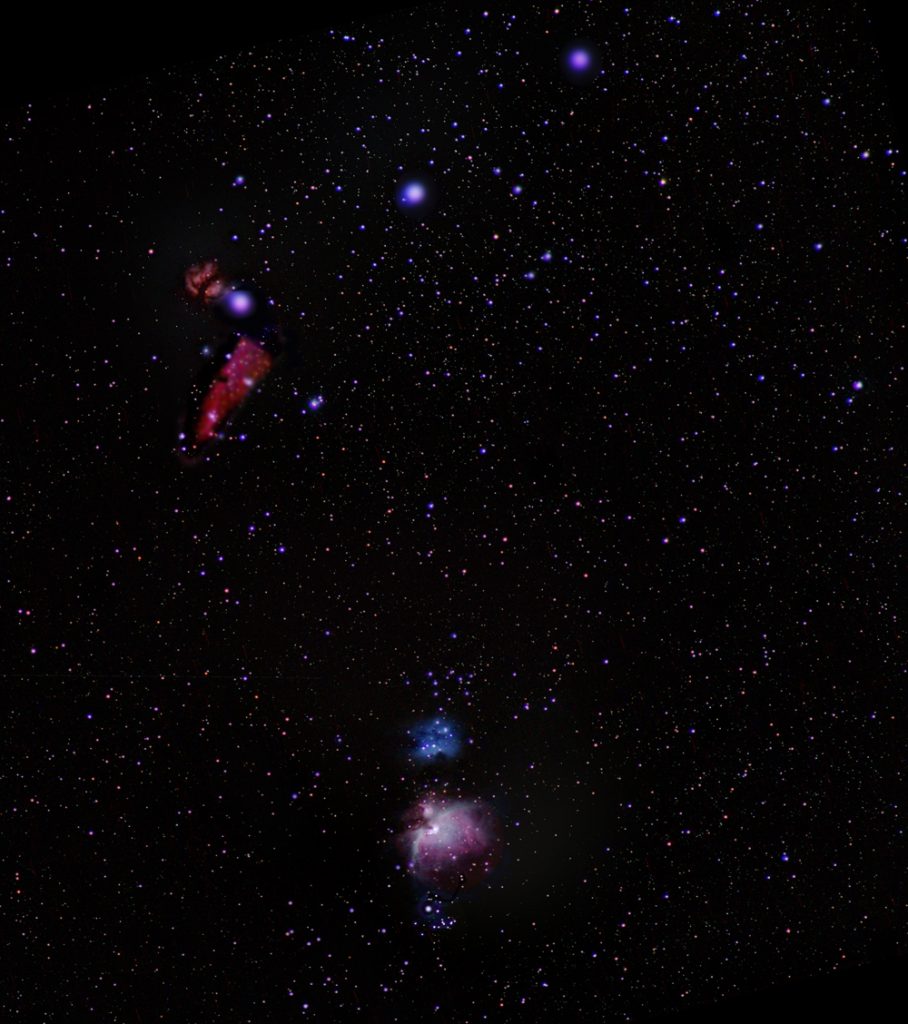
During an evening the week after I acquired a Sony α7S, 12 megapixel, camera there were two clear spells during which I was able to image both the Sword of Orion region and the Pleiades Cluster.
Equipment
The Sony α7S was used with a Nikkor 200mm, f/4, lens and the combination is heavier than I would like to use with my Nanotracker sidereal tracking mount and so for this exercise I employed my Astrotrac TT320 X-AG. Both are described in the article ‘Three Tracking Mounts…’ in the digest but it appears that the Astrotrac is no longer being made and I suspect that the Fornax LighTrak II is the now the best medium size tracker available.
A trackerneeds to be aligned on the North Celestial Pole (NCP), a little way fromPolaris in the direction of Kochab. (Alsoin Ursa Minor). The Astrotrac (andFornax) both have provision for a polar scope, but I prefer to use a laserpointer which I have adapted to both align the mount and also roughly align thecamera on the target area. When widefield astroimaging I do not use exposures longer than 30 seconds so that, witha 200mm lens, the NCP alignment does not have to be too precise. (The reason for this is to avoid the ‘SonyStar Eater’ problem discussed in the Sony α7S ‘review’ in the digest.)
TheAstrotrac/camera combination is quite heavy so the Astrotrac is mounted on asturdy Manfrotto tripod equipped with a Manfrotto ‘Junior Geared Head’. This makes it quite easy to align theAstrotrac on the NCP and many astrophotographers are using this, or the Benboalternative, as a better alternative to an equatorial wedge. The camera was mounted on the sturdyManfrotto 488RC2 ball head.
The adapted laser pointer is then mounted in the camera’s hot shoe so the camera can be pointed in the approximate direction of the target field. As the Sony α7S has such a low light capability, the star fields can be seen in the live view so precise alignment can then be easily accomplished without having to take any trial exposures. [It is this feature that makes the camera so good for wide field astrophotography.]
The Nikkor200mm, f/4, prime lens dates from ~1980 and is beautifully made in metal (withsome glass, of course). They can bebought from about £90. It was mountedusing a very simple Nikon to Sony e-Mount adapter as the aperture is controlledon the lens body. Stopped down to f/5.6it is said to be sharp across a full frame sensor though I found that towardsthe corners the brighter stars do show some coma.
Forastrophotography use, I have acquired an Andower NP-NW50 Dummy Battery Adapterwhich receives 5 volt power from a Grundig 8,000 mAh Powerbank. This can power the camera for a full nightsimaging. (Though, pleasingly, it ispossible to swap batteries without disturbing the mount.)
The Imaging
The camerawas set to record both raw and Jpeg frames. The Jpegs make it quick to scan through all the images so that any ofthe raw frames, such as when an aircraft crosses the frame, can be deleted fromthe stack.
For thePleaides Cluster, the ISO was set to ISO 3200. The Sony α7S sensor employes a ‘lower noise’ amplifier configurationabove ISO 2000 so this is probably the best ISO to use for manyapplications. (ISO 3200 is the first‘true’ ISO above 2000. The use of ISO2000 will simply scale down the brightness of an ISO 3200 image.) The exposure length was set to 20seconds.
For theOrion images, the ISO was reduced to 400 and the exposure length reduced to 15seconds. This would give the individual framesa higher dynamic range with less chance of ‘blowing out’ the central region ofthe nebula surrounding the ‘Trapezium’ stars. (As confirmed by observing a single frame.)
The ‘LongExposure Noise Reduction’ feature was turned off. If used, it will take an additional ‘darkframe’ with the same exposure and difference the two to remove hot pixels. This will, of course, halve the time imagingthe sky and also, but less well known, will actually add some noise into thelight frame. As described below, the hotpixels can be removed in the aligning and stacking software used to process theframes so it is not really necessary when stacking many light frames.
Processing the Orion data
The frames for each set then had to be aligned and stacked. In the past I have used Deep Sky Stacker (DSS) but there is now an alternative in Sequator (see article in the Digest). I had a real problem in trying to process the raw files in DSS as it either found no stars or thousands in which case it would take hours to work through the frames. There was no problem in using Sequator but, in the case of the Orion Image, it was important that the ‘High Dynamic Range’ stacking mode was selected. When this was not used, I found that the centre of M42 was ‘blown out’ even though in individual frames it was well exposed.
The ‘Remove Dynamic Noises’ mode was also activated so that hot pixels would be removed. When this was not activated, the result did show some hot pixel trails but they were only just above the noise. This one advantage of not having the mount precisely aligned is that the star field will move relative to their position during the imaging period so that the ‘light’ from the hot pixels is spread out when the stars are aligned and stacked. Another advantage is that which Tony Hallas has called ‘Colour Mottling’, caused by variations in the pixel sensitivity over scales of ~20 pixels, is greatly reduced and, in this case, was not visible in the stacked image. The image had drifted over the sensor by ~70 pixels during the imaging sessions, so only by ~1 pixel per frame which was not enough to cause any appreciable star trailing.
Removing Light Pollution
I used my ‘standard’ method for removing the light pollution. This is described in the digest article ‘Removing Light Pollution in Adobe Photoshop and GIMP’. The stacked image was duplicated and the ‘Dust and Scratches’ filter used with a radius of 50 pixels. This removed the stars except for the three stars of the belt and the Orion Nebula. These areas were cloned out from close by regions of the frame in the (reasonable) hope that the light pollution will not vary too quickly across the frame. In this case it was also important to clone over the region below Alnitak, the lower left star of Orion’s belt. This is where the H-alpha emission of the ‘Horsehead Nebula’ is found and, if this were not done, this would be regarded as light pollution. The ‘light pollution’ image was smoothed using the Gaussian Blur with a radius of 50 pixels and the two layers flattened using the ‘Difference’ blending mode. Hopefully this removes the light pollution from the image but it must be remembered that any stars or nebulosity that are fainter than the brightness of the light pollution will lost from the image which is why it is always better to image from a dark sky.
Stretching the Image
The image was stretched using the ‘Curves’ function in Adobe Photoshop with the lower (less bright) part of the curve lifted up. In this case it was important to inspect the Orion Nebula Region after each application of the curves function. It is critical that the central part of the nebula surrounding the Trapezium stars is not blown out so that, when one application of the curves function over exposed this region, it was ‘undone’ (Edit> step backwards). The central part of the nebula was selected with the oval selection tool and the selection inverted. Further applications of the curves tool would thus only brighten the remaining parts of the image. When the noise in the image became obvious no further applications of the curves tool were made and the levels tool was used to lift up the ‘black point’ of the image to remove the noise so producing the best image that could be produced from the 96 stacked frames.
Processing the Pleiades Data.
The sameprocess was used to remove the light pollution from the image produced bystacking the 46 raw frames in Sequator. Only the Pleaides cluster itself needed to becloned out in the light pollution image before differencing it with the stackedresult. The image was stretched as forthe Orion image.
Images
The Sword of Orion

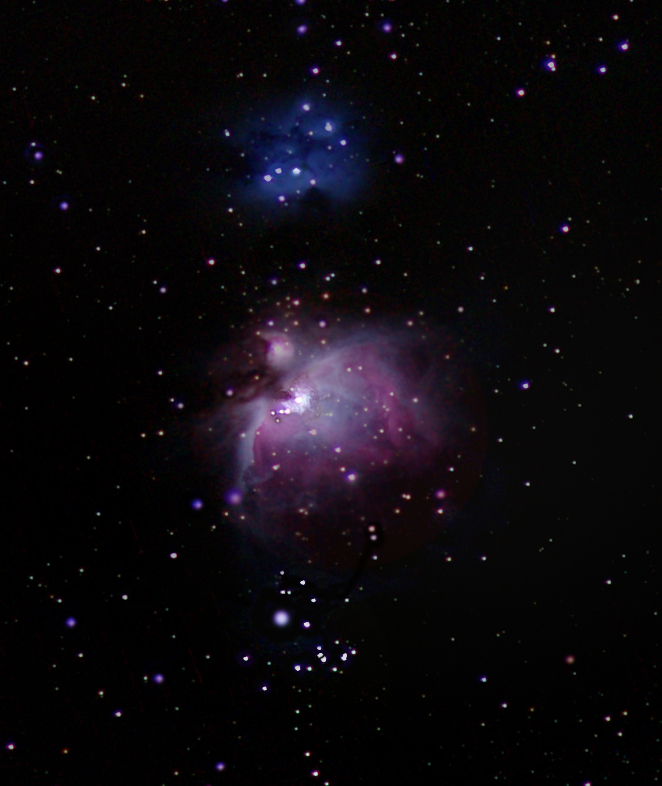
As seen in the cropped 100% image of M42 below, the Orion Nebula, has come out quite well with even a hint of the Trapezium stars at its heart. Above is the blue reflection nebula called the Running Man Nebula. To the upper left of Alnitak, the lower left hand star of the belt, is the Flame Nebula whilst, below, but not well shown, lies the Horsehead Nebula. The red light is H-alpha emission in the deep red and due to the filters employed to eliminate infrared light from the sensor and reduce the red sensitivity to match that of our eyes, the sensitivity of the sensor to H-alpha emission is reduced by about 75%. This is one reason that, often, H-alpha modified cameras are used to enable its light to be better captured.

The Pleiades Cluster

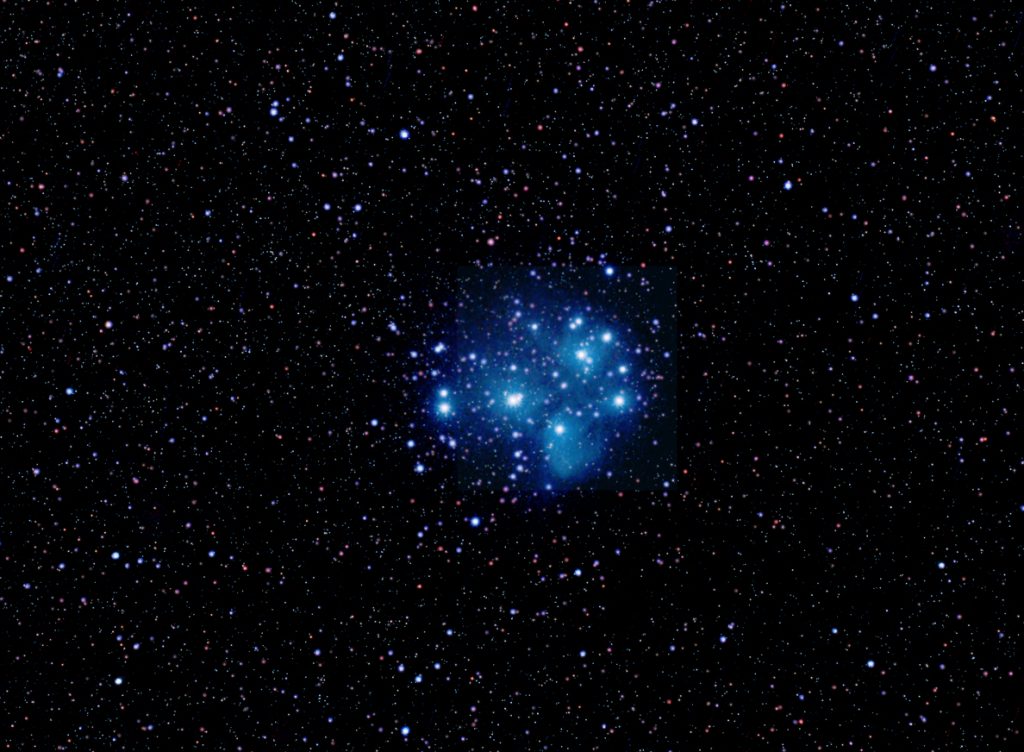
Quite apleasing image which shows up the blue nebulosity surrounding the cluster quitewell. The cluster is passing through acloud of dust which is scattering the light from the hot blue stars at itsheart.